
 Games
Games Game Series
 Guide
Guide
 简体中文
简体中文 हिन्दी
 한국어
한국어 Tiếng Việt
 ไทย
ไทยWe have all been there. You just spent a good amount of time tracking down and downloading a highly anticipated visual novel or an exclusive 18+ title. You eagerly double-click that .exe file, ready to finally dive into the game, and… BAM. Instead of the main menu, you are greeted by a confusing wall of alien symbols, question marks, or strange boxes. Or even worse, the game just throws an error message you can’t read and instantly crashes to the desktop.
It is incredibly frustrating, isn’t it? But don’t worry, your PC isn’t broken, and your game files are likely perfectly fine.
This nightmare, affectionately known in the gaming community as “mojibake,” happens because your Windows system is trying to read a game coded for a specific region (usually Japan) using your local language settings. The game gets confused, and the text breaks.
Luckily, you don’t need to completely change your entire Windows operating system into Japanese just to play one game. That is exactly where Locale Emulator comes in to save the day. Think of this lightweight tool as a clever disguise for your computer. It essentially “tricks” the specific game into thinking it is running on a native Japanese Windows system, allowing all the text, menus, and code to load flawlessly.
In this guide, I will walk you through exactly how to download, install, and use Locale Emulator so you can get past those annoying errors and actually get back to playing!
What You Need to Prepare Before Installing
Before we get into the nitty-gritty of the installation, let’s make sure your PC is ready. Setting up Locale Emulator is generally a breeze, but checking off these quick boxes will save you a massive headache later on.
A Compatible Windows OS
Locale Emulator is designed specifically for Windows 10 and Windows 11. If you are still rocking Windows 7 or 8 (hey, no judgment here!), this specific tool might run into compatibility issues. For older operating systems, you might have to look into alternatives like AppLocale, but for modern rigs, Locale Emulator is the undisputed king.
Pause Your Antivirus (Temporarily!)
Let’s be real, Windows Defender and third-party antivirus software (like Avast or Malwarebytes) can be a bit overprotective. Because Locale Emulator injects code into your game’s executable file to change its region status, your antivirus might falsely flag it as a Trojan or malware.
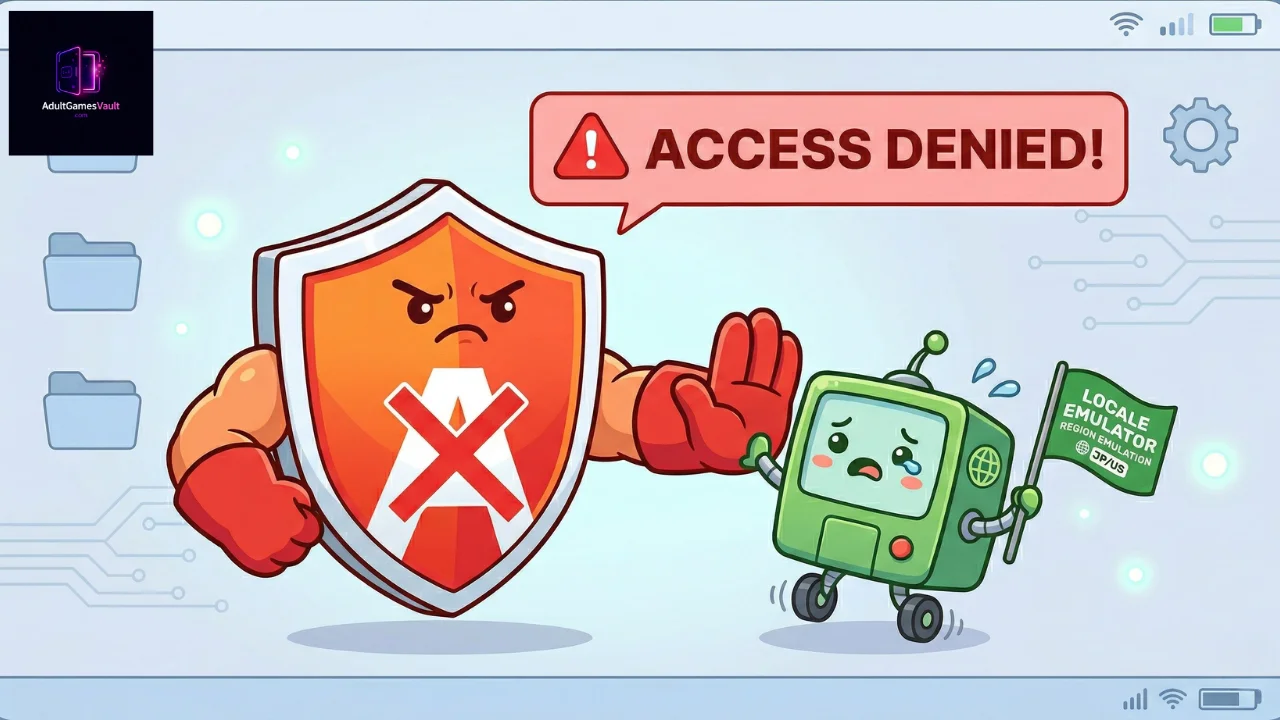
Don’t panic! It is completely safe as long as you download it from the official source. I highly recommend temporarily disabling your antivirus real-time protection just while you install it. Later, you can add the Locale Emulator folder to your antivirus “Exclusions” or “Whitelist” so it doesn’t get quarantined in the future.
Download the Official Files
Always grab the latest release of Locale Emulator directly from the developer’s official GitHub page. Avoid shady third-party download sites that bundle the software with unwanted toolbars or actual malware. Look for the latest “Release” version on the right side of the GitHub page and download the .zip file.
You can get it here:
https://xupefei.github.io/Locale-Emulator
Step-by-Step Installation Guide for Locale Emulator
Alright, you have the file downloaded and your antivirus is taking a quick nap. Let’s get this tool installed so you can finally jump into your game.
Step 1: Extract the Files Properly
First things first, do not try to run the installer directly from inside the .zip file. Windows hates that. Right-click the downloaded zip file and select Extract All.
Pro Tip: Extract this folder to a permanent, safe location on your computer. I recommend putting it somewhere like C:\Program Files\LocaleEmulator or a dedicated C:\Tools folder. If you leave it in your Downloads folder and accidentally delete it later during a cleanup, the tool will stop working!
Step 2: Run the Installer
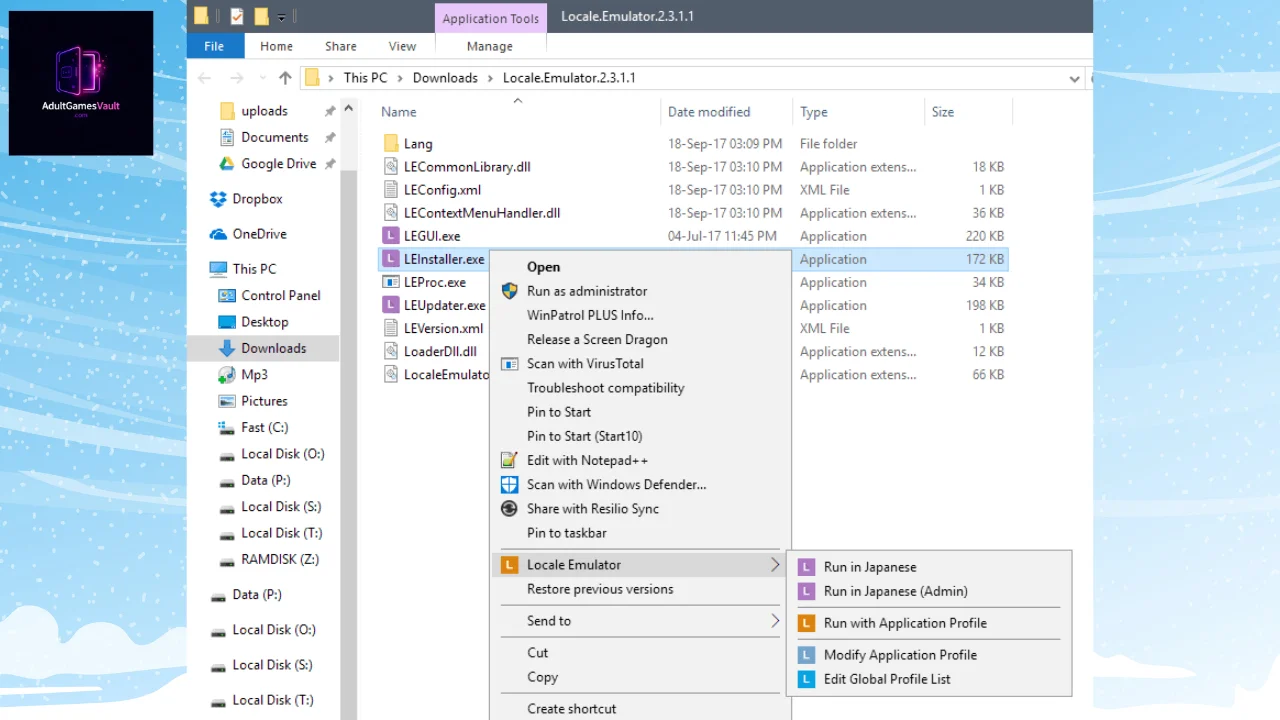
Open your newly extracted folder. You are going to see a few different files in there, but the one you want to look for is called LEInstaller.exe.
Right-click LEInstaller.exe and select Run as administrator. Giving it admin privileges ensures it can make the necessary changes to your Windows right-click context menu.
Step 3: Install the Context Menu
Once the tiny installer window pops up, you will see a button labeled Install / Upgrade. Click it!
The process is virtually instant. A small confirmation box will pop up letting you know the installation was successful.
Step 4: Restart Windows Explorer
For the changes to take effect, your computer needs to refresh. Sometimes Locale Emulator will prompt you to restart explorer.exe automatically. If it doesn’t, or if you still don’t see the option when you right-click a file, just reboot your entire computer. It’s the classic “turn it off and on again” fix, but it works every time.
How to Use Locale Emulator to Run Your Game
Now for the fun part. The tool is installed, and your visual novel or 18+ game is sitting there waiting to be played. Here is exactly how to launch it without the dreaded mojibake errors.
The Standard Right-Click Method
- Navigate to the folder where your game is installed.
- Find the main game executable (this is usually a file ending in .exe with the game’s icon).
- Right-click the game’s .exe file.
- In the menu that appears, look for the Locale Emulator option. (If you are on Windows 11, you might need to click “Show more options” at the bottom of the first menu to see it).
- Hover over Locale Emulator, and select Run in Japanese.
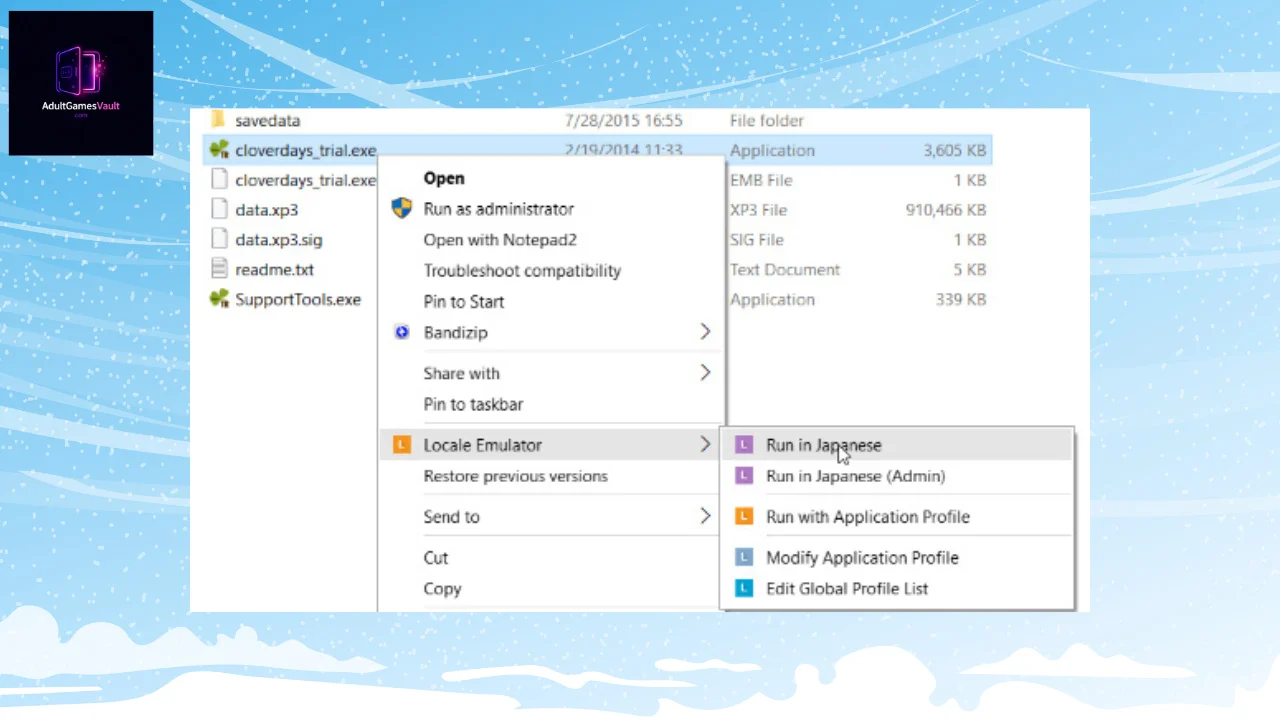
Boom! The game should launch perfectly. The menus will be readable, the text will format correctly, and the crashes should be a thing of the past.
Tweaking Settings with LEGUI
If you need to tweak time zones or set up a profile for a language other than Japanese (like Chinese or Korean), you can open the LEGUI.exe file located in your Locale Emulator folder.
Here, you can create custom profiles, set the fake registry language, and even change the time zone to match Tokyo time (which is actually required by some stubborn older games to bypass DRM!). Just make your changes, click “Save As,” give your profile a name, and it will now show up in your right-click menu.
Common Errors and How to Fix Them
Even with the best tools, PC gaming can sometimes throw a curveball. If you are still running into issues, check these common fixes:
Error: Locale Emulator doesn’t show up in the right-click menu
The fix: This usually means the installation didn’t register. Go back to your extracted folder, run LEInstaller.exe as an administrator, and hit “Install / Upgrade” again. Make sure to restart your PC afterward.
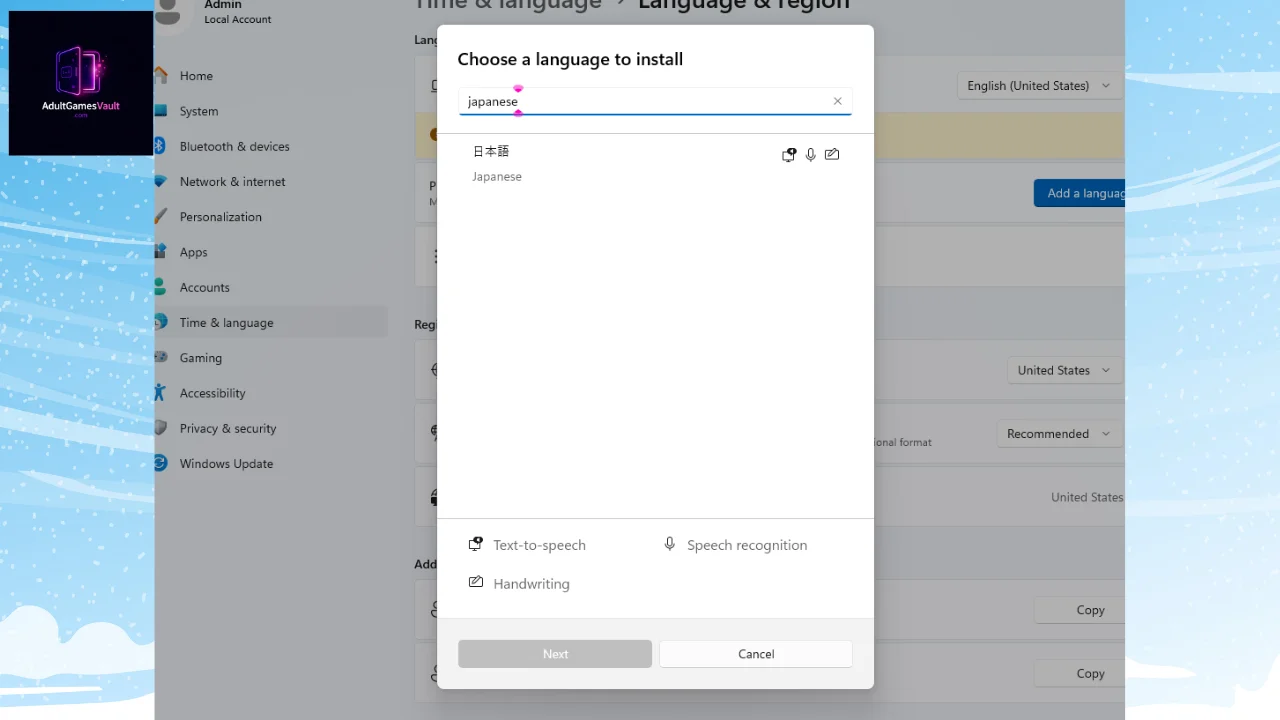
Error: The game launches, but the text is still missing or showing as blank squares
The fix: Locale Emulator fixes the region code, but your PC still needs the actual font files! Make sure you have the Japanese language pack installed on your Windows. You can add this by going to Windows Settings -> Time & Language -> Language -> Add a language.
Error: The game crashes immediately, even with Locale Emulator
The fix: Check your folder paths! Many Japanese games absolutely refuse to run if there are English spaces or special characters in the folder path. Move your game folder directly to your C: drive (e.g., C:\Games\YourGameName) and try launching it via Locale Emulator again.
Conclusion
Navigating the world of imported visual novels and region-locked 18+ games can feel like navigating a minefield of technical errors, but it doesn’t have to be. By taking five minutes to install and configure Locale Emulator, you are permanently fixing one of the biggest hurdles in the niche gaming community. No more gibberish text, no more instant crashes, and no need to mess up your entire Windows operating system.
Just remember to keep the software updated, whitelist it in your antivirus, and always use the right-click menu to launch your titles.
Have you run into any weird errors while setting this up, or is there a specific game you are finally excited to play now that your fonts are fixed? Drop a comment down below and let me know—I’m always happy to help troubleshoot!