
 Games
Games Game Series
 Guide
Guide
 简体中文
简体中文 हिन्दी
 한국어
한국어 Tiếng Việt
 ไทย
ไทยImagine this scenario: You have just spent hours downloading a massive, highly anticipated visual novel, an imported 18+ title, or a classic PC game. You finally extract the downloaded .rar or .zip archive, expecting to see a friendly little setup.exe file waiting for you. Instead, you are staring at a massive, single file ending in .iso, or maybe a confusing pair of files ending in .bin and .cue, or .mdf and .mds.
There is no installer. Double-clicking the file either does nothing or prompts Windows to ask you what program you want to use to open it. Panic sets in. Did you download a fake file? Is the game broken?
Take a deep breath! Your files are perfectly fine. You have simply encountered a “disc image.”
Back in the day, PC games were distributed on physical CD-ROMs and DVDs. When people back up these games or share them online (which is extremely common in the visual novel and imported gaming scene), they create a 1:1 digital replica of that physical disc. That digital replica is the .iso or .mds file you are looking at.
To play the game, your computer needs to believe that you have actually inserted a physical CD into a CD drive. But what if your modern gaming PC or laptop doesn’t even have a disc drive anymore?
This is exactly where DAEMON Tools steps in. DAEMON Tools is a piece of software that creates a “virtual” CD/DVD drive on your computer. It allows you to take that digital disc image file and “mount” it, tricking your PC into thinking a real, physical disc has just been inserted.
In this comprehensive guide, we are going to walk through exactly how to download, install, and use DAEMON Tools so you can finally install your games and get to playing.
Understanding Game File Formats: Why DAEMON Tools?
Before we dive into the installation, you might be wondering: “Doesn’t Windows 10 and Windows 11 let you mount .iso files natively without extra software?”
The answer is yes! If you only have a standard .iso file, you can usually just right-click it in modern Windows and select “Mount.” So, why do we need DAEMON Tools?
The imported gaming community, especially for visual novels and older 18+ titles, rarely uses simple .iso files. Many of these games feature complex copy protection or specific audio tracks that standard .iso files cannot capture accurately. Because of this, game uploaders use different formats that retain all that complex disc data.
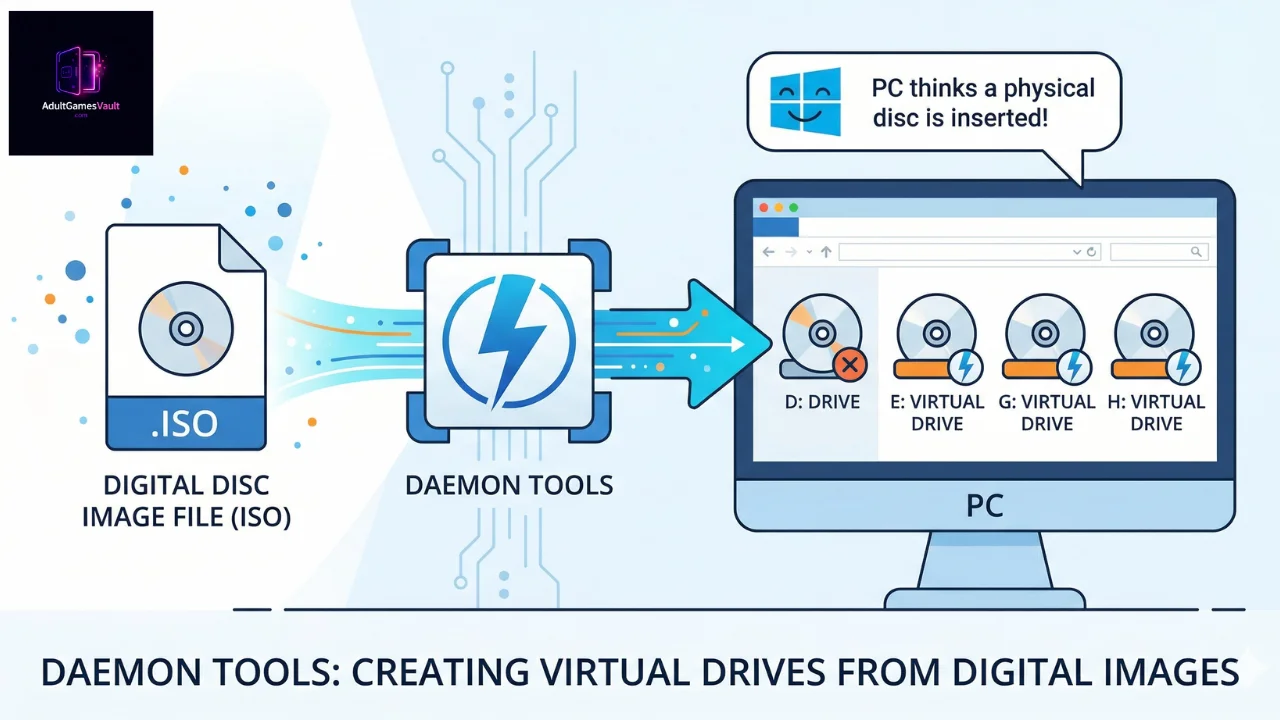
Here are the formats you will frequently encounter that Windows cannot open on its own, but DAEMON Tools handles flawlessly:
- .MDF and .MDS: Media Descriptor files. Very common for Japanese games.
- .BIN and .CUE: Often used for games that have mixed data (game files plus CD audio tracks).
- .NRG: Nero burning ROM image files.
- .CCD / .IMG / .SUB: CloneCD image files, used for bypassing old-school copy protection.
If you plan on diving deep into this niche of gaming, having DAEMON Tools installed is an absolute necessity.
What You Need to Prepare Before Installing
Getting DAEMON Tools up and running is straightforward, but there is one massive caveat you need to be aware of before you start clicking “Next” on the installer.
Choose the Right Version (DAEMON Tools Lite)
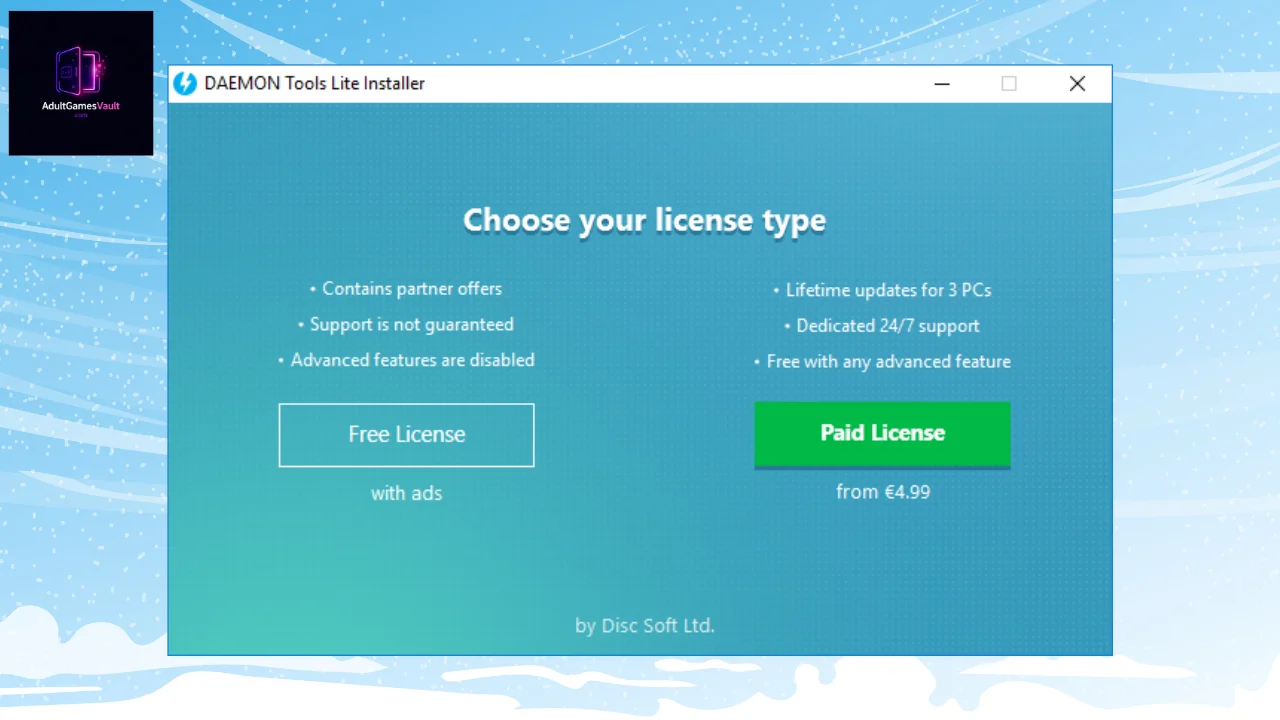
DAEMON Tools comes in several paid versions (Pro, Ultra, etc.), but for 99% of gamers, DAEMON Tools Lite is exactly what you need. It is free for personal use and does everything required to mount game images.
The Bundleware Warning (Crucial!)
Because the Lite version is free, the developers heavily rely on bundled software (often called bloatware or adware) during the installation process to make money. If you blindly click “Next” through the setup, you might accidentally install annoying web browser extensions, third-party antiviruses, or random desktop apps you do not want. Pay close attention to Step 3 in the guide below.
Step-by-Step Installation Guide for DAEMON Tools Lite
Let’s get the software safely installed on your machine without any of the extra junk.
Step 1: Download from the Official Source
Head over to the official DAEMON Tools website. Look for the DAEMON Tools Lite section and click the download button. Do not download it from third-party software aggregate sites, as those often inject even more bloatware into the installer.
You can download it here:
https://www.daemon-tools.cc/downloads
Step 2: Select the Free License
Run the installer you just downloaded. The very first screen will ask you to choose your license type.
- Ignore the big, flashy “Paid License” option.
- Select the option that says Free License (it might say “with ads”).
- Click “Agree & Continue”.
Step 3: Dodge the Unwanted Software (The Minefield)
This is where you need to read carefully. The installer will present you with “Special Offers.”
- It might ask if you want to install an antivirus (like McAfee or Avast).
- It might ask if you want to install a specific web browser (like Opera).
- Always look for the small text that says “Decline”, “Skip”, or uncheck the box that says “Yes, I want to install [Software Name]”. * Do not just click “Next” or “Accept” on these screens. Once you have declined the extra offers, the actual installation of DAEMON Tools will begin.
Step 4: Finish and Restart
Once the green progress bar completes, you can close the installer. It is highly recommended to restart your computer at this point so Windows can properly recognize the new virtual disc drivers that DAEMON Tools just installed.
How to Use DAEMON Tools to Install Your Game
Your PC now has a phantom CD drive! Let’s put a game in it.
The Quick Mount Method
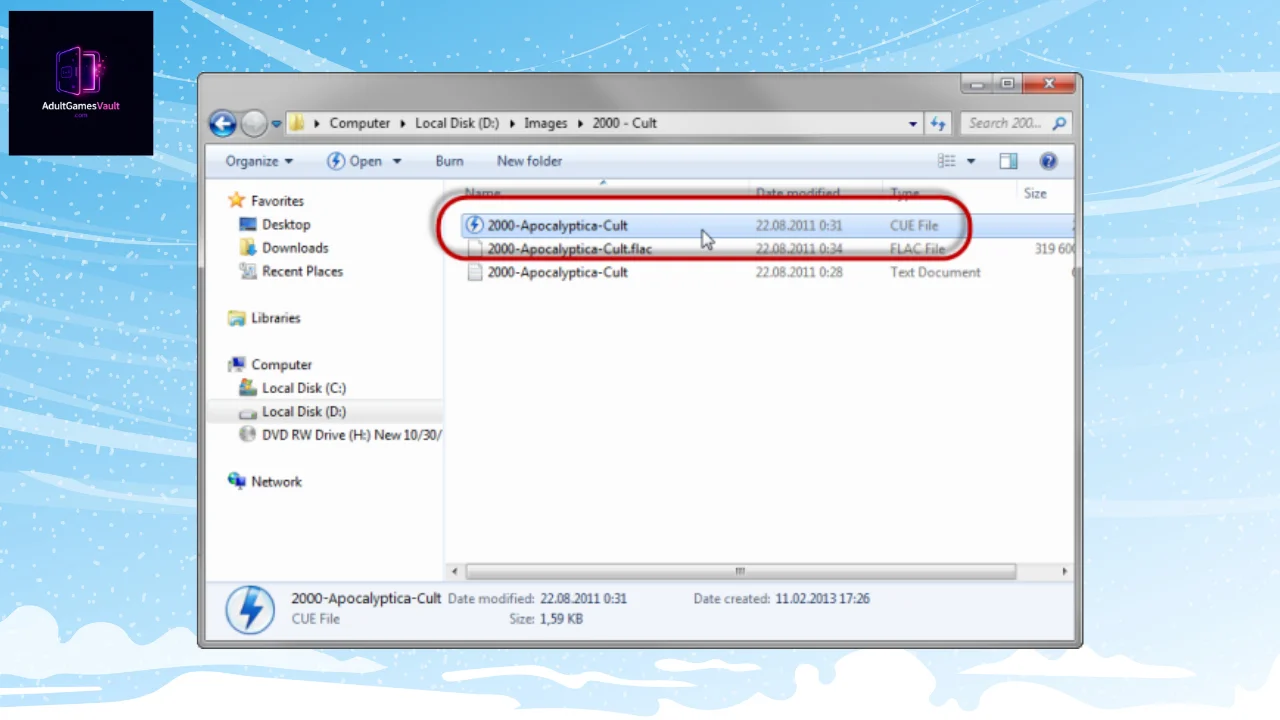
- Navigate to the folder where your game files are located (the .iso, .mds, or .cue file).
- Because DAEMON Tools is now installed, you will notice the icon for these files has likely changed to a blue lightning bolt (the DAEMON Tools logo).
- Double-click the file.
- A small notification will pop up in the bottom right corner of your screen saying “Mounting Image.”
The Drag-and-Drop Method
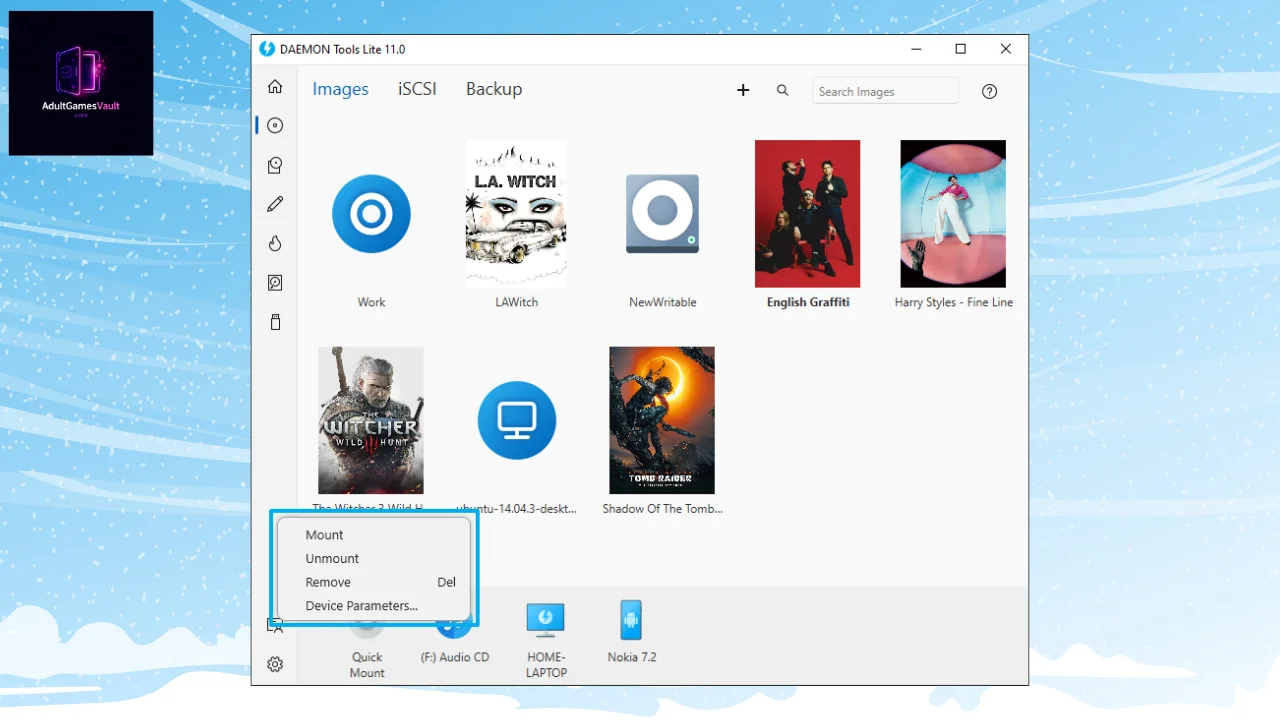
- Open the DAEMON Tools Lite application from your Start Menu or Desktop.
- At the bottom of the app window, you will see a small icon of a disc drive.
- Simply drag your game file from your Windows folder and drop it directly onto that disc drive icon in the app.
Installing the Game
Now that the image is mounted, open “This PC” (or “My Computer”). You will see a brand new CD/DVD drive listed there, usually with the name of your game next to it!
- Double-click this new virtual drive.
- It will open just like a real CD. Look for a file called setup.exe, install.exe, or occasionally an autorun file.
- Run that setup file and install your game normally, choosing your preferred installation path (remember to avoid Japanese characters in the folder path if you are using Locale Emulator).
How to Unmount When You Are Done
Once the game is installed, you don’t need the “disc” in the drive anymore.
- Open “This PC”.
- Right-click your virtual drive.
- Select Eject or Unmount. The virtual disc will be removed, and the drive will appear empty again.
Dealing with Multi-Disc Games
If you are playing a massive visual novel or a game from the early 2000s, you might have a game that comes with “Disc 1”, “Disc 2”, and “Disc 3” files.
When you install the game using Disc 1, the installation bar will eventually pause, and a window will pop up saying: “Please insert Disc 2 to continue.”
Do not close the installer! Here is how you handle it:
- Leave the installation window open.
- Go to “This PC”, right-click your virtual drive, and select Eject to remove Disc 1.
- Now, navigate to your game files, find the file for Disc 2, and double-click it to mount it into that same virtual drive.
- Go back to your paused game installer and click “OK” or “Continue”. The installer will recognize the new disc and resume perfectly.
Common Errors and Troubleshooting
Error: “Please insert the original CD/DVD.”
The Fix: You successfully installed the game, but when you click the game’s desktop shortcut to play, it asks for the disc. This is old-school DRM (Digital Rights Management). You have two options: either keep the game image mounted in DAEMON Tools every time you want to play, or look inside the virtual disc for a folder usually named “Crack” or “No-CD”. Copy the .exe file from that folder and paste it into your game’s installation folder, replacing the original file.
Error: “File not accessible” or “Image format not supported.”
The Fix: This usually happens with .cue files. A .cue file is just a tiny text file that tells the computer where the main .bin data file is. If you renamed the .bin file, the .cue file can’t find it anymore! Open the .cue file with Notepad and make sure the filename written inside matches the actual .bin file on your computer exactly.
Conclusion
Mounting virtual discs might feel like an archaic practice in the age of Steam and direct downloads, but for preservationists, visual novel enthusiasts, and players of niche 18+ titles, it remains a vital skill.
DAEMON Tools Lite, despite its annoying installation quirks, is the most robust and reliable tool for handling every obscure disc image format the internet can throw at you. Once you get the hang of mounting and unmounting, dealing with .mds and .cue files will become second nature, giving you access to thousands of games that are otherwise impossible to play on modern hardware.